This beautiful pleated dress was inspired by My Sparkle's
Mock Smock Frock. Using fat quarters, you can make a baby dress any size 0-12 months, or a toddler/child's top.
Materials:
2 matching fat quarters
matching bias tape
Step 1: On both of your fat quarters measure and mark with a fabric pen at the following measurements from the top: 1/2", 3", 5 1/2", 8".
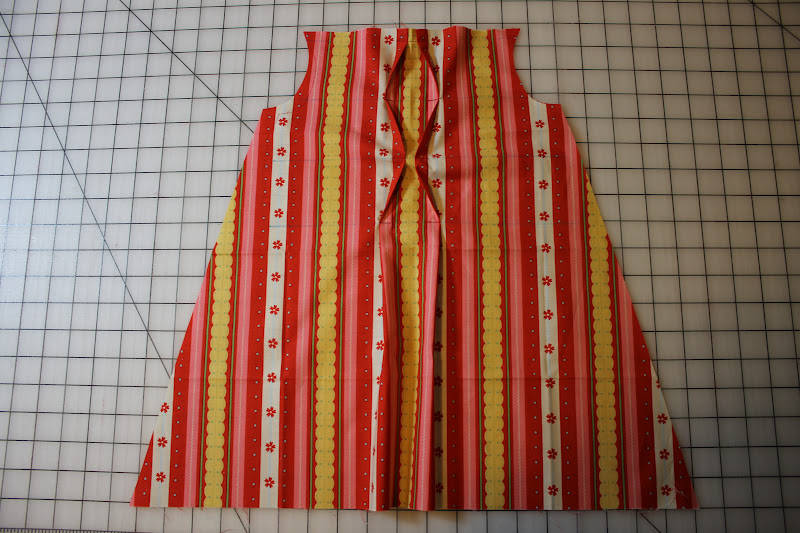
Step 2: Find the halfway point along the top. About 1/2" away from this point, you're going to pinch the fabric on either side of the center up about 1/2" and pin in place from the top down to your 8" marking.
You're now going to sew down each of these pleats that you made from the top down to the 8" line.
Step 3: At the 1/2" line you're going to fold the two flaps in and sew in place, then out at the 3", in at the 5 1/2", and out again at the 8", sewing the flaps down at each. Repeat steps 1-3 on the other fat quarter.
Step 4: Find a dress/top that fits your little one that you want to model after. Fold each in half like so. Place the piece of clothing on top of the fat quarter and use it as a guide to trace out the arm holes. We're going to make the shoulder straps out of bias tape, so you don't need to worry about those at this point.
Cut out your dress shape from both fat quarters.
Step 5: Place the two dress pieces right sides together, pin and sew along the sides (don't sew the arm holes!).
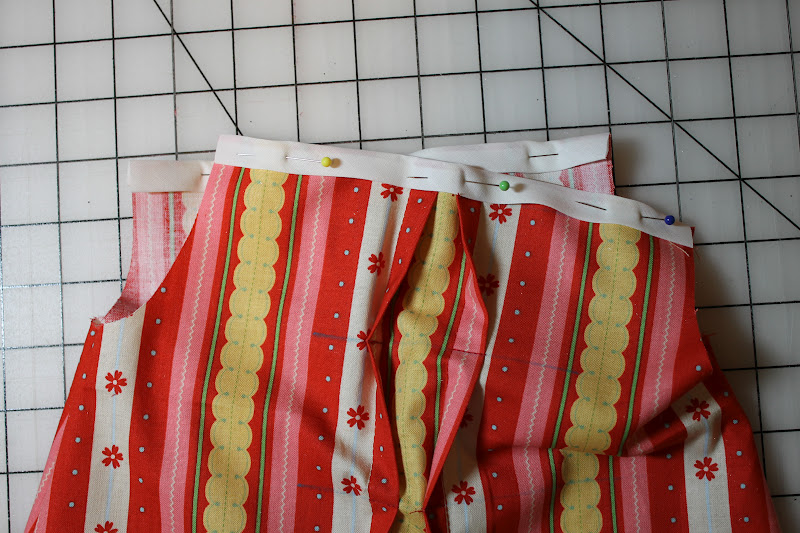
Step 6: Turn the dress right side out. measure the two top pieces. Cut corresponding lengths of bias tape, pin and then sew in place as shown.
Step 7: Using your piece of clothing from before as a guide, figure out how long you want the straps to be, mine went up about 2" from the top of the dress. Pin your bias tape in place starting at the base of the arm hole working your way up and around the shoulder and back down again. Make sure you have enough bias tape cut to have some overlap at the end. Repeat on the other arm.
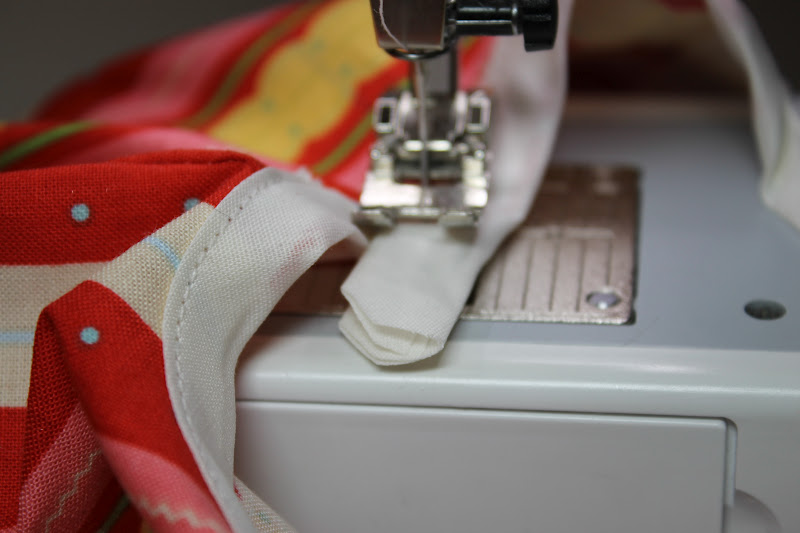
Here are some pictures of how I finished the bias tape around the arm hole. Get about 1-2" away from the end, stop and lift your sewing machine foot with the needle down.
Clip the bottom corners of your remaining bias tape.
Fold them under,
sew across, and then finish the seam by going up the edge as well.
Step 8: Hem the bottom and you're done!


Very interesting Dress story!! Great work with this... Really impressed at the hard work and dedication you guys have put in!!! It’s a cool concept.
ReplyDeleteThanks
Khadiza Akter
"zur taufe"