Tuesday, July 31, 2012

Healthy Banana Oatmeal Baby Cookies

Ada is eating everything we put in front of her, except the mountain of baby cereal we have. So in an attempt to get her to eat it, I looked for some recipes to use it up and this has been a HUGE hit! I got the recipe from here and changed it a smidge. This is great because it doesn't have any sugar in it, which makes me feel like it's ok that she eats 2 whole cookies after dinner. : ) I also like them because they're nice and soft, they almost have a bread like consistency.
Ingredients:
1 C flour (I do 1/2 white and 1/2 wheat flour)
1/2 t baking soda
3/4 t cinnamon
1/4 t salt
3/4 C crisco
1/2 C juice (I used apple juice)
1 egg (if your baby is under 1 you can substitute 2 egg yolks, or 3T applesauce)
3 medium ripe bananas, mashed
2 3/4 C baby oatmeal cereal

Step 1: Preheat oven to 400. Combine flour, baking soda, cinnamon and salt in bowl.

Step 2: In a separate bowl, cream the shortening, juice, egg and banana. Gradually add the dry ingredients and mix well.

Step 3: Place dough balls on greased cookie sheet. Bake for 12 minutes until lightly browned.

Note: You should freeze the cookies your baby won’t be able to eat in 5 days. Just take a few out a couple hours before you need them and they'll be fully defrosted and delicious!

Sunday, July 29, 2012

Weekend Sweets: Frozen Berry Cobbler

This week I made a not-so-bad-for-you dessert that is akin to cobbler, but it's frozen and whip-creamy, perfect for summer. This recipe calls for using raw egg whites (similar to traditional mousse) but I think you could easily skip them if they freak you out. I got the basic recipe here, and then changed it to suit my needs.
Ingredients:
Topping:
1 C wheat flour
1/4 C brown sugar
1/2 C quick oats
1/2 C chopped walnuts
1/2 C butter (melted)
Creamy Frozen Berry Deliciousness:
2 egg whites
1/4 C sugar
2 t lemon juice
2 C raspberries (fresh or frozen)
1 C blueberries (fresh or frozen)
12 oz cool whip free (thawed)

Step 1: Preheat oven to 350. To make the crunchy topping, combine the wheat flour, brown sugar, quick oats, and chopped walnuts in a bowl. Pour the melted butter over them and mix until combined.

Step 2: Put the mixture in a pan and place it in the oven. Cook for 20 minutes, stirring it every 5.

Step 3: Whip your two egg whites on high. Add your sugar a smidge at a time. Continue to beat until stiff peaks are made.

Step 4: Add your lemon juice to the egg mixture and then the berries, mix on low until combined. With a spatula, mix the cool whip into the egg mixture.

Step 5: In a 9x13 pan (I greased mine, but I'm not sure it was necessary) plop all of the berry mixture into the bottom and spread it out evenly. Then sprinkle the crunchy topping on top. Cover and freeze for a couple of hours until it's frozen. Enjoy!

Note: This recipe makes 12 servings. If you want to omit the egg whites, just skip them and mix the remaining ingredients into the cool whip with a spatula.

Friday, July 27, 2012

Fat Quarter Friday: Notepad Cover

Does anyone else find immense joy from making lists and then crossing things off of them? Well I am a list addict, so I thought, why shouldn't I feed this addiction by making my list making even more enjoyable? I found this cute notebook folder tutorial over at the Riley Blake Designs Blog. I love Riley Blake fabrics, so cute! So I decided to try this little notepad cover. I had a couple issues with their tutorial, so mine has a couple minute changes. This project is fairly involved, so if you don't love lists, it may not be for you!
Materials:
2 fat quarters
fusible interfacing
thin batting
1 large button

 Step 1: Print out the pattern so you can cut out your fabrics. (I didn't actually use the patterns, I just looked at them and then cut the fabrics accordingly, but do it however you feel comfortable.)

From your outer fabric (pink):
2 Outer/inner panels
2 Slanted pockets (facing opposite directions)
2 Button straps

From your inner fabric (black):
2 Outer/inner panels
2 Notebook pockets
2 Card pockets
 From your interfacing:
4 Outer/inner panels
2 Notebook pockets
2 Card pockets
2 Slanted pockets (facing opposite directions)
2 Button straps

From your thin batting:
2 Outer/inner panels
Step 2: Iron your interfacing pieces to their corresponding fabric pieces using whichever method your interfacing says to. Make sure to fuse them to the wrong sides of your fabric.
Step 3: We're going to make the outside cover. Take your two Outer/inner panels in your outer fabric (pink) and lay them right sides together.
Then take your two batting pieces and sandwich them around the pieces you just put together.
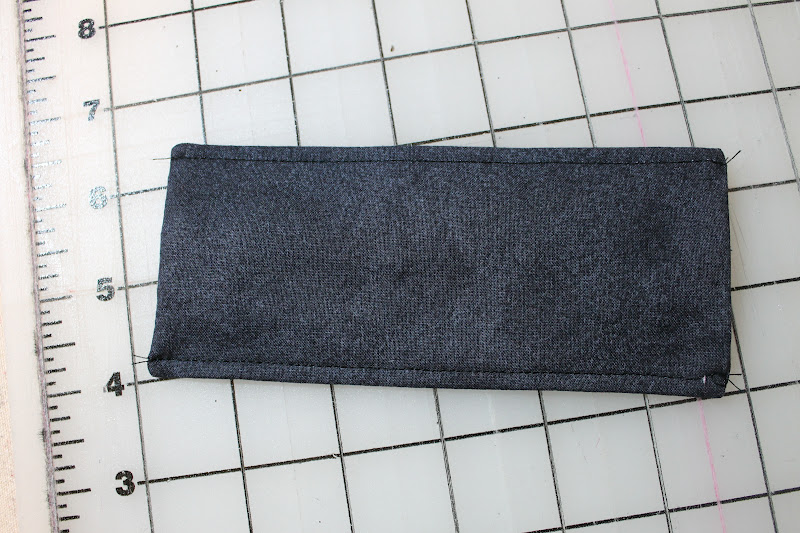
Now using a 1/2" seam, sew them together along one of the long ends. Cut off excess fabric,
and iron open the seam. Set aside for a minute.
Step 4: Take your Button strap pieces and lay them right sides together. Using a 1/4" seam, sew around three sides leaving one of the short ends open. Trim your corners.
Turn it right side out and topstitch 1/8" from the edge along the three sides. Using the button strap pattern piece, mark where your button hole will go. You can make your button hole at this time or at the end, it's up to you, I waited until the end, but it would probably be easiest to do it now.
Step 5: Using the Outer/inner panel pattern mark where your button should go and attach it to the outside cover piece.
Now we're going to pin the button strap on the opposite panel from the button. Make sure that it is lined up with the button. Position the strap so that the end of it is 5" from the edge of the cover.
Step 6: Take the two pen pocket pieces and place them right sides together. Sew (1/4" seam) along three edges leaving one of the short edges open. Trim your corners.
Turn the pocket right side out. Turn under the open edge 1/4" and iron.
Topstitch 1/8" from the edge along the two long sides.
Step 7: Take your two slanted pocket pieces and lay them right sides together. Sew along the slant using a 1/4" seam.
Turn right sides out, iron and then topstitch along that slanted edge with a 1/8" seam.
Step 8: Position the pen pocket like so on the slanted pocket piece and sew along the bottom edge and the two sides. Also make sure to sew a line down the pocket to make a little pen slot.
Pin the slanted pocket piece onto the right side of the Outer/inner panel (black).
Step 9: Take the two notebook pocket pieces and place them right sides together. Sew along one of the short edges using a 1/4" seam.
Turn right side out, press and topstitch (1/8" seam).
Place this piece on top of the final Outer/inner piece (black) and pin in place.
Step 10: Take your piece you just finished and your slanted pocket panel and arrange them like so.
Flip the panel on the right on top of the slanted pocket panel (right sides together). Sew layers together using a 1/2" seam. Trim off any excess.
Iron open your seam.
Step 11: You should now just have two big pieces leftover, the inner pieces and the outer.
Put them right sides together and pin in place.
Sew using a 1/4" seam around all the edges, leaving a 3-4" opening for turning. Trim your corners.
Turn right side out.
Topstitch around the entire piece with a 1/8" seam. Make sure to close the turning opening as you go. Now sew three seams down the spine, each about 1/8" away from each other.
 You're all done, enjoy! 

Wednesday, July 25, 2012

Happy Blog Birthday to Me!

I can hardly believe that I've been blogging for one year as of today. That means Ada is approaching her 1st birthday as well. I'm not sure which makes me feel older: having an almost one year old, or having a crafting blog that's a year old. Just to throw some stats at you: I've had 131 posts and about 93,000 page views. Not too shabby! I want to thank everybody who reads my blog, you're awesome!!!

I know a lot of people do fun things for their blog b-day's, but I'm not sure what those things are, so I'm going to do some best of, worst of, because those are always fun!

Best Fat Quarter Friday

Worst Fat Quarter Friday 
 Dog Bandana (It was too easy to be a FQF: Cut a triangle, tie it around your dog's neck, done...)

Best Recipe
Chocolate Chip Cookies (They might just be better than you know what)

Worst Recipe
Lemon Bars (ugh, these were disgusting)

Best Other Tutorial
 Bubble Quilt It's so squishy!

Worst Other Tutorial
Jean Quilt Yes, I'll admit it, I'm prejudice against denim projects.

Best Thrift
I LOVE this necklace I got at an antique mall for $1!
 

Worst Thrift 
This little shopping cart was only $1, but when we got it home we saw that it was really broken on the bottom, I'm not sure it's usable even after I attack it with glue and duct tape.

Best Picture of Ada 
Awesome outfit and "artistic" photography

Worst Picture of Ada
She's sporting some unfortunate baby acne and her accessories don't match her outfit, sorry baby!

Best Picture of Me
This outfit is one of my favorite (Skirt: Banana Republic Outlet, Tank: Old Navy $4, Earrings: Thrift store: $0.50, Sandals: target $15)
Worst Picture of Me
I look lumpy and my hair's all weird, it looks like an unflattering wig...

And here are some other random best of worst of for this blog year.

Best book my SciFi/Fantasy book club read: Mistborn by Brandon Sanderson

Worst book my SciFi/Fantasy book club read: Dragon's Egg by Robert Forward (too sciencey for my taste, plus, there weren't any dragons in it, lame!)

Best TV show: Game of Thrones Best. Show. Ever! (note: there's a lot of sex and nudity, so beware!)

Worst TV show: Yo Gabba Gabba (Sorry little G) Those songs get stuck in my head and make me want to explode, and dance! My name is Skyler and I like to dance!

Best thing I did this year: Have a baby! (And lose all my baby weight and then some!)

Worst thing I did this year: Agree to pet sit our friend's ferret for a month. If someone asks you to watch their ferret, SAY NO!!!

I'm looking forward to another great year! Thanks so much for reading!!!