Materials:
1 Fat Quarter
Approx. 1/3 yard fusible interfacing
This Template
Step 0: A quick explanation
A large part of this tutorial is figuring out how to fit our tie onto a fat quarter when the pattern of our fabric demands that we cut "on the bias" (that is, diagonally). If your pattern doesn't need to be cut this way, you can simplify your life considerably by simply cutting 3 inch strips across your fat quarter.
Step 1:
First, cut your fat quarter to an 18 inch square. A bit bigger or smaller than this is just fine, but it should be square.
Step 2:
Cut that square in half down the diagonal, so that you have two triangles.
Now rotate one of the triangles onto the other, so that both have the same side face up.
Cut out two 3" wide strips from these two stacked triangles, followed by a strip which is 1 3/4" wide. The little triangle on the right is scrap. Set aside the 1 3/4" strips for now, we'll come back to them later.
Now from the 3" strips, cut one end off, so that it is square. Leave the other end at a 45 degree angle.
Step 3:
Cut strips of interfacing to be just less than 3" wide. If your interfacing comes in 20" rolls like mine does, you'll need 4 strips.
Now fuse the interfacing to the strips you just cut out using your interfacing's directions. Make sure that you fuse the interfacing to the back side of the fabric. Usually, this just means steaming it under a hot iron for about 10-15 seconds.
Step 4:
Now we'll cut out the actual shape of the bow tie. Print out the pattern linked above on regular paper, and be sure that you print it at actual size. It should be 3" wide at the widest point. Cut the pattern out.
Now stack the matching pairs of strips, both with interfacing side up, and place the template on the square end.
Trace around it with a sharpie or fabric pencil, and cut it out. make sure that when you cut it out, there is no trace of your markings left - it will show through the finished product if there is. Repeat with the other pair of strips too, so that you have four bow-tie-shaped pieces, as pictured.
Step 5:
This step is sizing the bow tie. In order to size your bow tie, you'll need to know what size shirt you will wear it with. At least, for men's shirts, this should work. My husband's shirts are a size 16 or 16 1/2 neck, which I'm fairly certain is the circumference in inches. By trial and error, I found that this corresponds to a bow tie with total length 37 1/4 inches. My guess is that if you take the the neck size and add on 21 inches, you should be in the ballpark.
For simplicity, I'm going to assume that your final tie is going to be 37 1/4 inches too, but the same steps will work regardless.
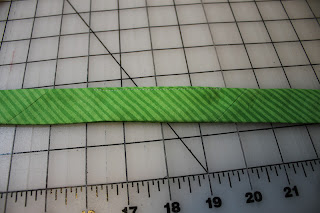
First, lay out your bow tie pieces to measure them. Pair a long piece with a short piece. In this picture, mine are 36" long.
Taking into account that there will be 1/4" seams on each end of each piece (including the third piece that we are about to construct), we want our total length to be 1 1/2 inches longer than 37 1/4 inches, or 38 3/4 inches. We'll need to add a middle piece which is 2 3/4 inches on a side.
Now, you could do that, but I personally think that such a small piece is too much of a hassle to deal with. I don't want to put in a piece smaller than about 4 inches. So I actually cut down my longer pieces by a few inches, shortening the total length to 32 inches instead of 36.
This means that my third strips need to be 6 3/4 inches long.
If I had a slightly bigger square than 18 inches, or if my husband had a slightly smaller neck, I might not have needed a third piece at all. If that happens for you, it will make your life that much easier, and you can skip the next step.
Step 6:
Cut out your third strip to fit in the region between the others, with each side measuring 6 3/4 inches. Because of the diagonals, this means that the total length of the strip will be longer - just make sure that the length of the actual side is 6 3/4 inches.
You'll notice that mine are about 1/2 inch short - I forgot about the 1/4 inch seam allowances for this middle piece. My resulting tie was a bit short, for that reason, but it still fits.
Now cut and attach interfacing to these strips, just as you did for the other pieces, and we are ready to actually do some sewing!
Step 7:
Take 1 long piece, 1 short piece, and 1 middle piece, and prepare to connect them in a line. What we will do is the following: at each connection, turn the pieces as in this picture.
Sew along the diagonal. Once you have done this, you should have something like the top part of the next picture.
Press these seams open, like in the lower left of the above picture, and then trim them, like in the lower right.
Congratulations, you now have a single long piece that looks something like a bow tie! Do it with the other pieces, and you'll have something like this:
Step 8:
Notice how in the above picture, the seams are staggered? That's because on the top piece, the long piece is to the left, while on the bottom it is on the right. Keeping the pieces like this, place them together, with the right sides facing, and pin them together in a few places.
Sew around the edge, keeping a 1/4 inch seam, starting near one of the seams in the middle, and finishing about 2 inches before you complete the loop.
The hole that you've left is how we will turn the tie right-side out. Speaking of which, now we trim up the corners and make some relief cuts along the curves, in preparation for turning the tie.
Step 9:
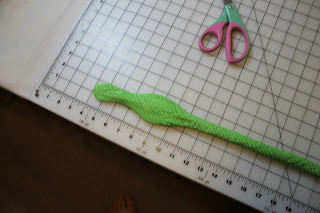
Turn the tie right-side out. I used the non-pointy end of a knitting needle. This is a bit tricky, but can be done. The result looks like a wrinkly, puffy snake (apologies for the blurry picture).
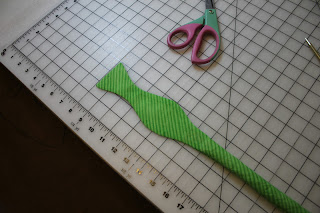
Using the pointy end of your knitting needle (or similar object), poke out the corners and the rounded bits, so it looks like this.
Now give it a press with your iron to see the bow tie shape. We're nearly there!
Step 10:
The last thing we need to take care of is stitching shut the opening. You can hand sew it closed with a whip stitch, but my husband really doesn't like to do hand sewing, so he just make a quick seam on the outside with a machine. It's barely noticeable, not to mention the fact that it will always be hidden beneath a collar.
You are all done! Admire your handiwork.
Step 11 (optional):
A bow tie is no good if you don't know how to tie it, though. My husband says that this site is a good tutorial. It only took him two tries to get a decent looking bow, so don't be discouraged. Practice a few more times, and you can do it too!


thank you so much this was amazing im sohappy this is here ive ben loing for this fevr
ReplyDelete