Friday, September 30, 2011

Fat Quarter Friday: Fabric Flower

This week I made a cute little fabric flower. Although this craft is quick and easy to make, it took me about 3 days to complete it. Apparently having a baby makes crafting much more difficult (My last two Fat Quarter Fridays were done prior to having Ada). I was looking for inspiration for this fabric flower last week and found a tutorial that I based this off of, but when I went looking for it again I couldn't find it. I'm not one of those people who knows how to check their internet history, so sorry I can't give credit to the blog I designed my flower from.

Materials:
1 Fat Quarter
Needle and Thread
1 or 2 Buttons

Step 1: Find two circles from around the house that you can trace. My two circles were about 4 in and 3.5 in in diameter. Trace and cut out 4 large and 3 small circles. I know I have 5 large in the picture, but I only ended up using 4. Once they're cut out, iron them in half and cut them down the middle.


 Step 2: Take each little half circle and fold it right sides together and sew along the open straight edge (leave the curved edge open). Do this for all of the little half circles. You'll then have a bunch of little pizza slice looking thing. Use a pencil to help you turn them right side out.


 Step 3: Now I didn't get a good picture of this step because I can't figure out how to take a close up picture with my camera, so I'll try to explain it really clearly. Take one of the little triangles (keep your larger and smaller triangles separate) flatten it out so that the seam is on one side and the curved edge is facing you. Now take a needle and thread and hand sew and running stitch along the curved edge of the triangle. Once you've got to the end, pull on the thread so that the fabric gets a little scrunched up. This is your first little petal. Continue adding petals onto the same string until all the triangles of the same size are one the thread. When all the petals are on, scrunch them up as much or as little as you want, and circle the petals around until the first and last petals meet. Go through the first petal with the needle and thread and secure it so that the scrunched petals don't come loose. Tie it off and you have your first part of the flower. Do the exact same thing with the other size triangles. You should now have two rings of petals, one bigger (with 8 petals) and one smaller (with 6 petals).
 Step 4: Set the smaller ring of petals on top of the larger ring and secure it in place by making a couple of stitches connecting them. It should really start looking like a flower now!
 Step 5: Cut out a small circle (about 2 in in diameter). I used the same fabric from the flower, but a felt circle would work really well here so that you don't have to turn under the edges. Turn your flower over so that the back of the big flower ring is all you see. Place the little circle over the hole in the middle and sew it on (making sure you turn under the edges as you go). I just used the same stitch and technique that I use for applique which is to take little bites of the top fabric and larger bite of the bottom fabric, that way you don't see much if any of the thread. The picture of this is pretty lame, but again, I don't know how to use my camera very well.
 Step 6: To cover up the hole on the top of the flower I decided to put a couple buttons over it. I was initially only going to use one button, but I thought that the two buttons looked cute layered together. Just sew on the button as you normally would sew on a button, and voila, you have a cute little flower!
I haven't decided what I should do with this flower now that I have it. I was thinking about making a few more and attaching them to a purse, or something. I want to make a smaller one and attach it two a onesie for Ada, cuteness!

Tuesday, September 27, 2011

Tuesday Weigh In - Week 2

Ada is officially two weeks old today! That means it's time for my week 2 weigh in and picture. I'm feeling much better physically this week than I did last week. I'd love to start exercising (aka walking the dogs around the neighborhood) but it's been really rainy here and it's supposed to stay rainy all week. I guess it'll just have to wait!

Current weight 185 lbs
Weekly weight loss 5 lbs
Total weight loss 28 lbs

Friday, September 23, 2011

Fat Quarter Friday: Tablet Case


 So my husband is the proud new owner of a tablet. He was dismayed to discover that his new tablet did not come with one of those cheap-o cases to protect it from getting scratched. So until he could buy or make a better one, I whipped together a simple case out of a fat quarter.

Materials:
1 Fat quarter
Some velcro

Step 1: Measure your tablet, Brian's is approximately 7" x 10.5". I figured about an inch and a half more than the length and roughly three times the width would be sufficient so I cut my fabric to 12" x 21"
Step 2: Fold one of the short edges under twice about 1/4 to 1/2 inch to make a clean edge.
 Step 3: Layout your fabric right side up and grab your hemmed edge. Fold that edge up so that from the folded edge to the hemmed edge is the same as the width of your tablet. Mine was about 7". Pin in place.
 Step 4: Sew along both sides with a 1/4 inch seam. I decided to follow that with a zigzag stitch for a little extra strength. Test fit your tablet and adjust as needed. I took mine in a little bit for a nice snug fit.
 Step 5: Turn the case right side out. You'll notice that the flap is longer than the pocket for the tablet. Simply iron that extra fabric down so that the flap is the same width as the pocket. Tuck in the raw edge of the sections your just ironed and iron again so that your have clean edges and sew down them.
 Step 6: Test to see how long your want the flap to be when you fold it over and trim it to be that length. I made mine about 4". Take the top of the flap and turn that edge under twice. Iron if you want and sew along it. Now your flap should have all clean edges.
 Step 7: Decide where you want your velcro to go on the case. I marked with a fabric pencil where they lined up. Put the scratchy side of the velcro on the pocket and the soft pieces on the flap. That way every time you slip the tablet into the case you're not rubbing it up against the scratchy velcro. Sew on the velcro with your machine by outlining the velcro square and getting as close to the edge as possible.
 You're all done. Now you can put your tablet in it's happy new home!

Wednesday, September 21, 2011

Tuesday Weigh In - Week 1

Although I'm not starting any diet or exercise plan as of yet (I want to wait until I can sit down without cringing before I start working on any of that) I still want to start documenting my journey back to my pre-Ada weight. The weight is coming off so fast right now, it's pretty crazy! Biggest Loser fans know that yesterday was the start of the 12th season, so I thought that since Ada was born on Tuesday the 13th and Biggest Loser is now on on Tuesdays that I would make Tuesday my weigh in/picture day!

Here is a picture of me just a couple of days before Ada was born. I weighed in at (warning, this number make shock and alarm you) a whopping 213lbs. Ouch! Hey I'm 5'10" ok.
 Here I am one week after Ada's birth, 9/20/11, weighing in at 190lbs. It feels pretty amazing to lose 23lbs in one week especially when I'm devouring candy corn by the bag. (We all have our weird things, and mine is candy corn. I usually eat around 10 bags of the stuff every fall. Thank goodness it's not available year round!)

Awaiting Ada No More


So on the 13th of this month Ada was born: 8lb 1oz, 20.75 inches long, 10 fingers, 10 toes and all cute. Labor and delivery were both such incredible experiences. It's hard to describe what it was like, but it was absolutely amazing and I'm glad I was able to go through it. They almost had to do a c-section because of some complications during the tale end of the labor, but it worked out that I was able to deliver her myself with some assistance from a vacuum. We had such great doctors and nurses throughout our stay at the hospital, everyone was so kind and helped to make it such a great experience. More to come about little Ada later!

Friday, September 16, 2011

Fat Quarter Friday: Makeup Bag

This Friday's project: Makeup Bag! I'm very excited about this one because I've never really had a pretty makeup bag before. I did get one from a friend for my bridal shower, but it seems silly to use a bag that says "Bride" on it when I am no longer a bride. Plus it's a white bag, which doesn't look all that great when it's had makeup in it for forever, it's pretty dingy. This tutorial is pretty similar to the change purse with a few little differences.

Materials:
2 Fat Quarters (I used the leftovers from the reversible purse tutorial) or you can use 1 fat quarter if you don't care about the lining being a different color.
Some fusible interfacing
9" Zipper (or bigger if you want a bigger bag)

Step 1: Cut out two pieces of fabric to any size you want. I don't have a ton of makeup, so I made mine out of leftovers from my reversible purse project. My pieces were 8" x 18". Iron the short sides in 1/4" for the hem. No need to sew them right now. At this point you can also iron on the interfacing to one of your pieces. I ironed it onto the piece that I wanted for the outside to make later steps a little bit easier.

 Step 2: Take the fabric that you want to be on the outside and sew the hemmed edges onto your zipper. This time I centered the zipper on the fabric so that neither edge of the zipper met with the edge of the fabric. I wanted to try this because on my change purse the zipper was a little wonky.
 Step 3: Unzip the zipper about 3/4 of the way and flip it inside out. Trim off the extra zipper stuff so that it matches up with the edges of the fabric.
 Step 4: Take your other fabric (the lining) and fold it right sides together so that it looks like your other fabric. Now you're going to cut out 1" squares in the bottom corners of each of the fabrics. Once you've done that, sew along the sides.

 Step 5: Now you take the corner in which you cut out the square and squish it to close the other way. You're now going to sew this little piece. Repeat with all four cut corners. This will give your bag a nice shape.

 Step 6: Turn the fabric with the zipper right side out and slip the lining (still inside out) into the bag. Now you can hand sew the top of the lining onto the outside of the bag. This is made easier by turning the top of the bag (while holding both pieces of fabric) down so that the lining fabric is showing on the outside. I forgot to take a picture of this, so if you're confused you can look at the picture on the change purse tutorial.
 All done! Now you can stuff it full of your makeup!

Friday, September 9, 2011

Fat Quarter Friday: Ruffle Dog Harness

Warning: This week's craft is bizarre...

Anyway, so this week I made a Ruffle Dog Harness. A few weeks ago we went with some friends to the Amish Acres Craft Fair and saw these ridiculously hilarious frilly dog harnesses. Our friends wanted us to buy one for our fluffy girl dog, but they were quite a lot of money to spend on something that we would only buy ironically, so we passed. I got to thinking that I could make one for just a couple dollars as one of my Fat Quarter Friday projects, so enjoy...or don't...
Materials:
1 Fat Quarter
1 D Ring
1 Small Buckle
Note: If you have a bigger or stronger dog, you may want to add something like interfacing or webbing to this tutorial to make the harness stronger. My dogs are weak and small, so this will be plenty to contain them...

Step 1: Take your dog's measurements. Mine are listed for a 9 pound Pomeranian.
Around their ribcage: 17"
From their shoulder blades to where the ribcage strap would go: 3"
Across their shoulder blades to halfway down their sides: 9"
Across the front of your dog's chest back to where the ribcage strap would go: 15"
I used this picture to help guide my measurements and my process. If you like the harness but don't want to make one yourself, this website has some: Ruffled Easy-On Dog Harness

Step 2: Cut your fabric strips out of your fat quarter. I added an inch to each of these measurements and since I wanted the straps to be about 1" wide, I cut all the strips to be 2.5".
Ribcage Strap: 2.5" x 18"
Small Top Strap: 2.5" x 4"
Long Top Strap: 2.5" x 10"
Chest Strap: 2.5" x 16"
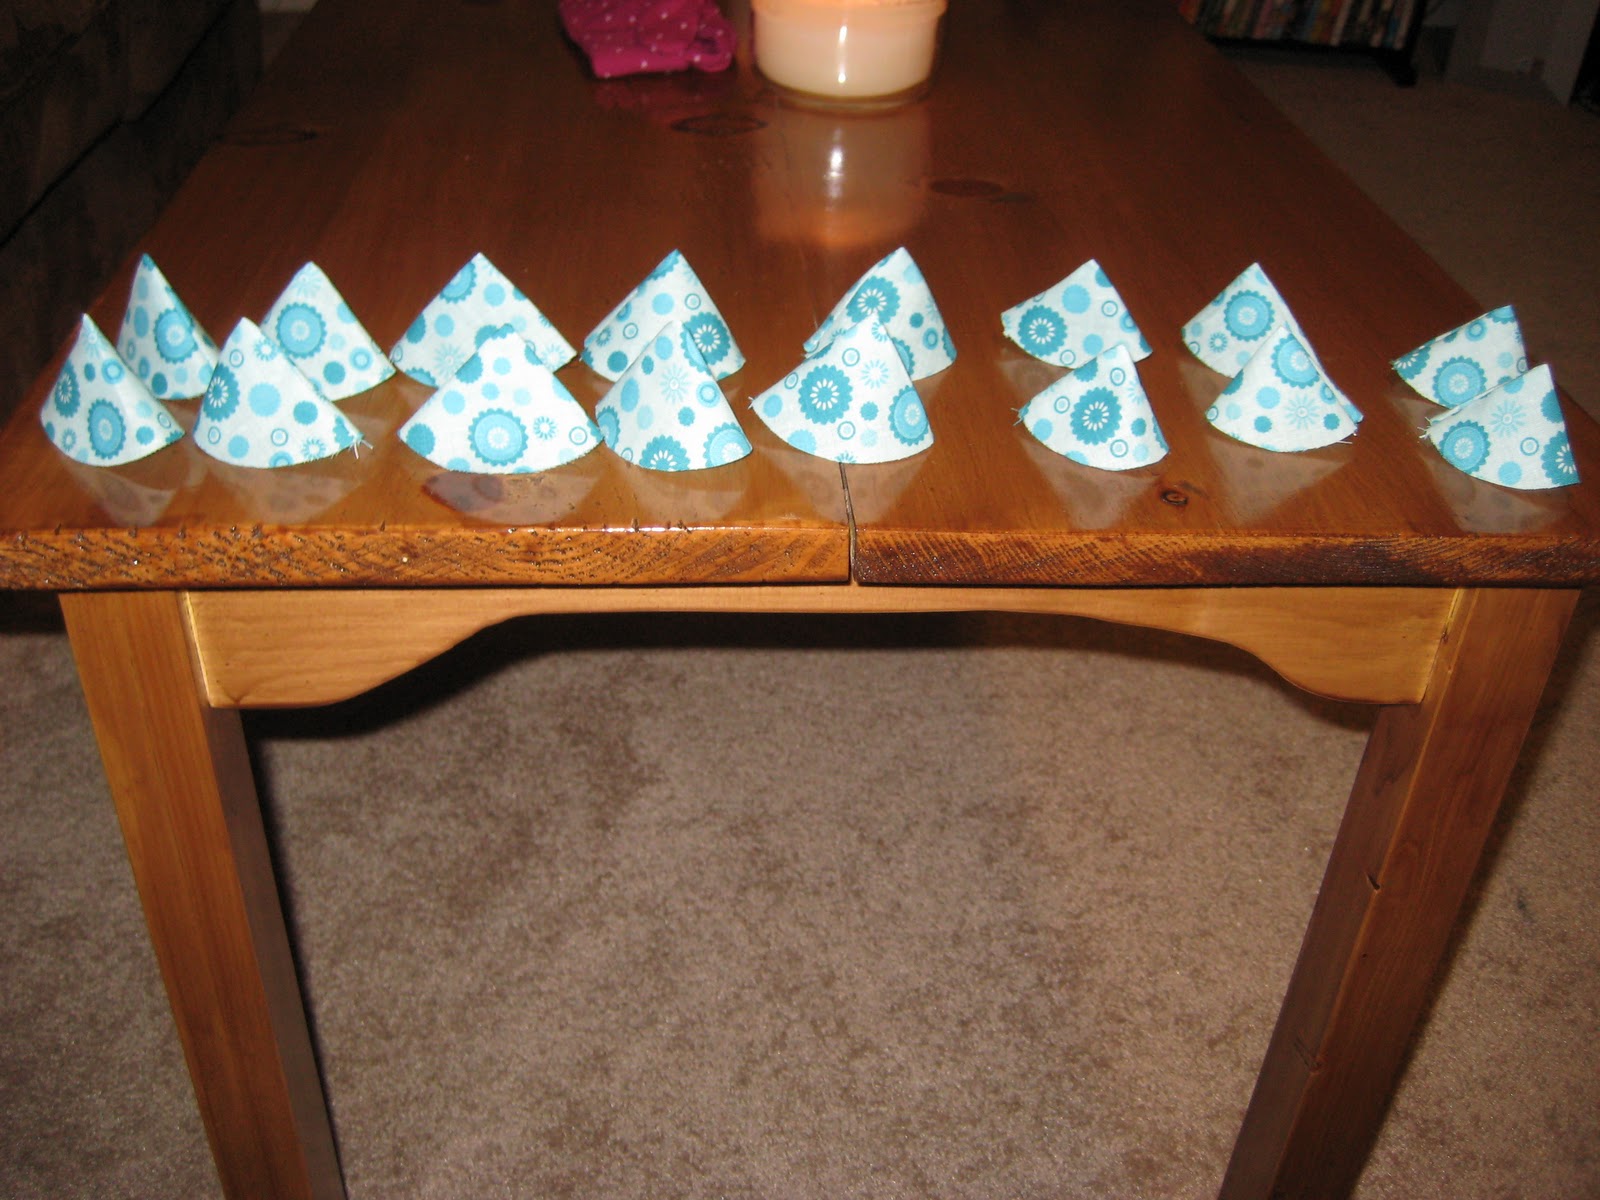
If you want to add the ruffle cut it to be 8" wide and as long as your ribcage strap. So in my case 8" x 18"
 Step 3: On all of your pieces of fabric fold right sides together hotdog style and sew along the long edge.
Step 4: Turn your strips right side out and iron. Next, tuck the raw short edges inside the tubes and iron again. Now you're going to top stitch all the way around each of the skinny strips. Don't top stitch around the wider piece of fabric, instead just sew closed the short edges.

Step 5: On your wide piece of fabric do a quick basting stitch along one of your long edges. Pull on the strings until you've got the fabric ruffled to at least half of the length that it was when you started. Just pull until you get the look you want. My piece started out 18" long and I pulled until the gathered edge was 8".
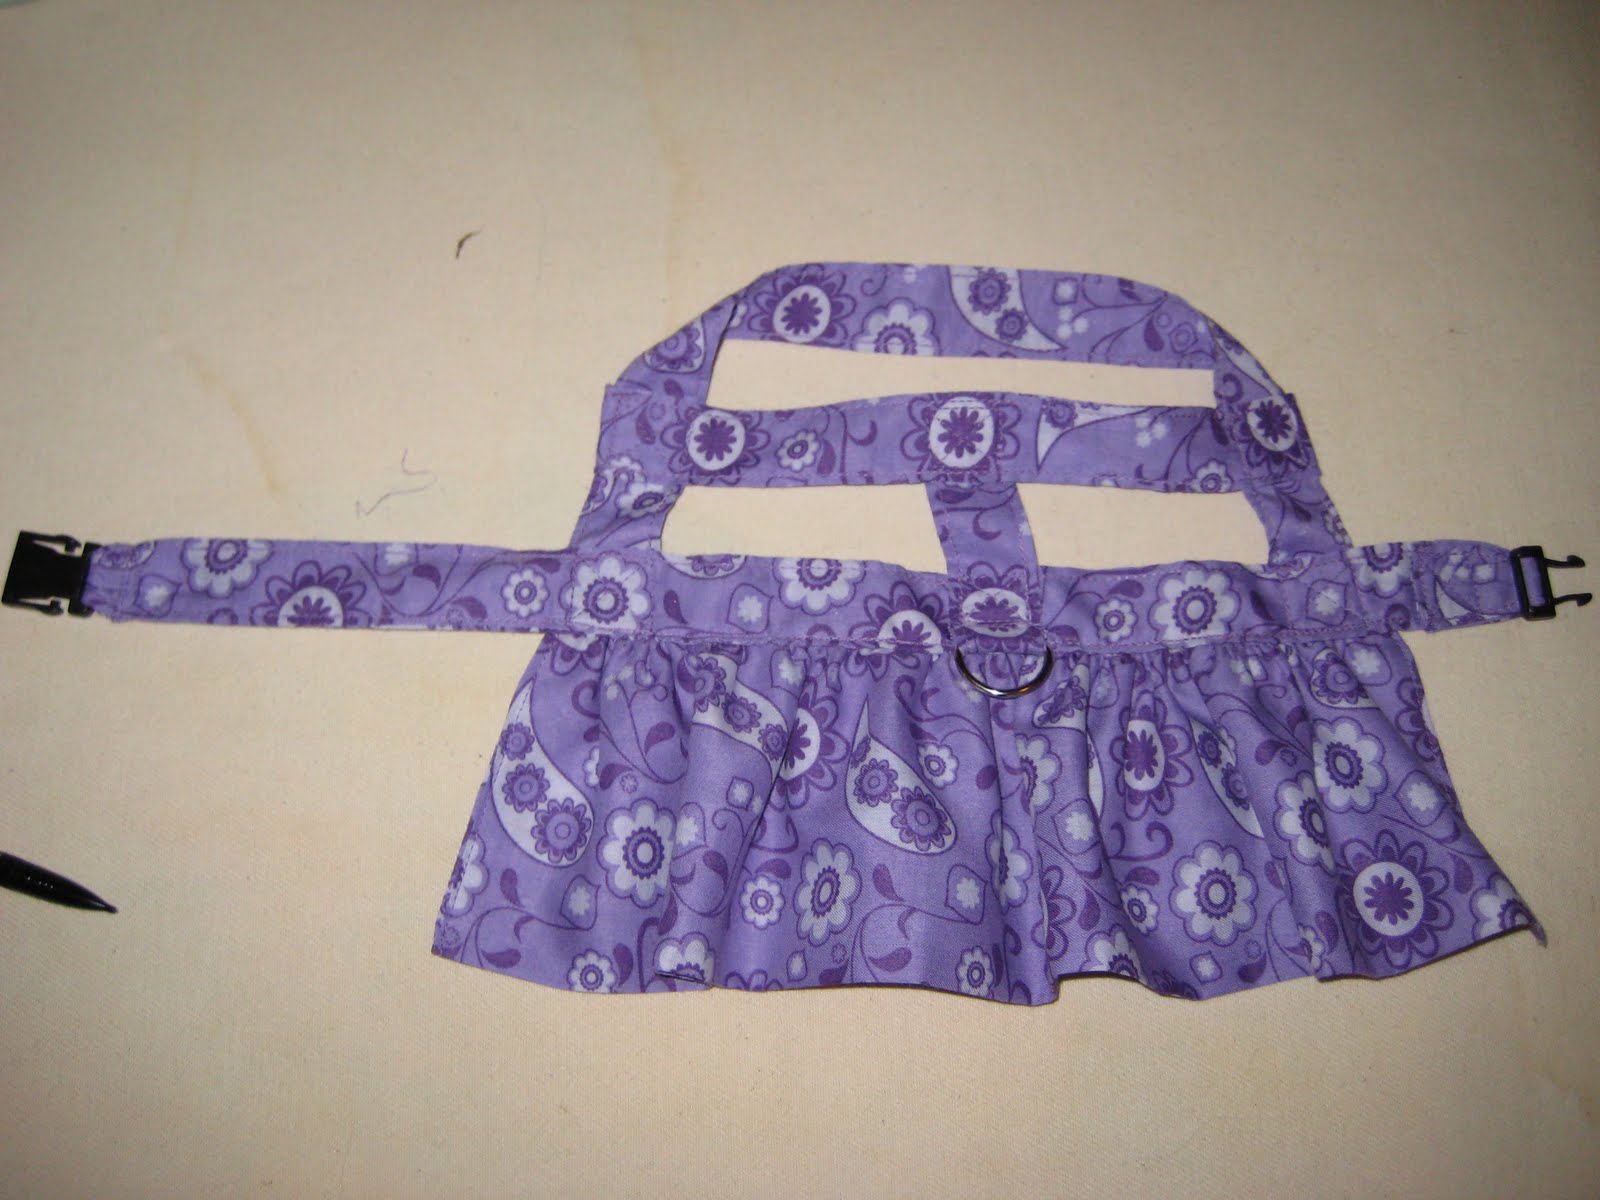
Step 6: Take your shortest strip and sew the D ring onto one end. I just folded one end of the fabric through the ring and sewed across a few times for stability.
Step 7: Now take that short strip with the D ring on it and the Long Top Strap (the second shortest one in my case) and line them up so that the longer piece is the top of a T and the D ring piece is the vertical piece. The top piece of fabric should be laid on top of the D ring strip so that they overlap and make a 1" x 1" square. To sew the pieces together I sewed a box around that 1" x 1" square and put an X in the middle of it. I know it's impossible to see in the picture, but you get the idea, and if you don't, just sew them together where they overlap.
Step 8: Take your Ribcage strap (the longest one) and loop one of the ends through the end of one side of the buckle. Now sew that strip in place (go over it a few times for strength). Now slip the other end of the strip into the other side of the buckle and go test fit it around your dog's ribcage before you sew anything. You want it to fit snuggly, but not too tight. I adjusted the strap until I could get a few fingers under it. Now sew that flap to the strip so that it won't move around.
Step 9: I wanted my buckle to snap on the side of my dog instead of under her belly, so my strap is off center. Pin the gathered edge of the ruffle right along the under edge of the Ribcage Strap. Sew together.
Step 10: Take your strap with the D ring and set it on top of the Ribcage Strap (making that 1" x 1" overlapping square) centered with the ruffle. Now attach these pieces together by sewing around the outside of that square and putting an X through the middle.
Step 11: This is the trickiest part of the whole thing because you have to take your remaining strip and attach it in four different places, but before you can sew it, you need to test fit it on your dog to make sure it fits. This can be tricky if you have a wiggly dog since dogs and needles don't really go all that well together. Luckily my dog is pretty mellow and when she's nervous she turns into a lump of fluff and doesn't move, so this was pretty easy for me. This final strip fits across your dog's chest and attaches to both ends of the Long Top Strap and to the Ribcage Strap on either end of the ruffle. This part can't really be shown since it will be different for each dog, but you just kind of fiddle with it until it looks right. Once you've got everything where you want it, sew the boxes with the Xs in each of these four connecting areas.
Step 12: Put the harness on your dog and cringe. Yikes, I can't believe I just spent my day making this! I'm not sure I'll ever let my dog where this when we go on walks, but who knows, maybe I will.
Here's Goomba looking like a fox. She hates the camera and was trying to run away from me.
I also made my other dog wear the harness so you could see more of what it's supposed to look like. It's hard to tell on Goomba since she's got so much hair. Hobi was rather depressed about wearing the girly harness as you can see.