
Doesn't she look so happy to wear them? Or you know, super pissed.

Materials:
1 fat quarter
minky scraps (or fleece, or something else warm)
4" narrow elastic (I used 1/4")
5" velcro
Step 1: Make a template. I used a cd for the main part of the mitten and then drew some lines straight down from it, about 2" from the bottom of the circle. See the picture of my template if that explanation is as horrible as I think it is.

Cut out four of the mitten shapes from your fat quarter

Make two sandwiches with the right sides together and sew along one side of each as shown in the picture.

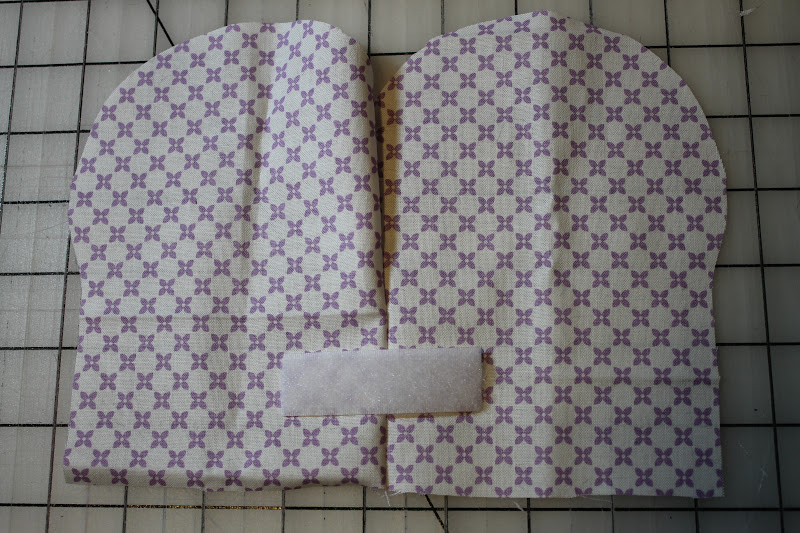
Open up the partially sewn mitten and place a 2.5" strip of velcro (the fuzzy side) over the seam like so. Position it about 1" up from the bottom edge and sew in place. Repeat on the other mitten.

Start at one end

and stretch the elastic as you sew down the length.

Now it gathers up nicely on one side. Repeat on the other mitten.


Fold the square in half right sides together and sew along two of the edges leaving one of the short ends open (1/4" seam). Clip the corner.

Turn the rectangle right sides out and topstitch 1/8" away from the edges along the three finished edges. Then place the velcro like so and sew in place. Repeat for the other strap.


Fold one of the sides of the mitten over on itself (right sides together) and sew around the outside with a 1/4" seam leaving the straight edge open. Clip around the curved parts, or use pinking shears. Repeat with the other mitten.


Wiggle everything around so that the side seam meet up and the raw edges meet up and then pin the layers together.

Then sew around the openings with a 1/4" seam.


Topstitch around the opening with a 1/8" seam.
You're all done!
Enjoy your mitten paddle hands!

These would be a fantastic addition to your etsy shop!
ReplyDelete