Now that I've made about 100 of these cutie 10 Min Onesie Dresses I'm pretty much an expert. Not really, but there were a couple changes that I made to the process because I kept messing up. I found the original tutorial here
http://blogs.babble.com/family-style/2011/07/06/make-for-baby-25-free-dress-tutorials-for-babies-toddlers/ It's a great tutorial and I'm by no means an actual expert (far from it), but there were some things that I changed around a bit. I can't wait to try some of their other dress tutorials! I love the pillowcase one with unicorns on it! Adorable!
10 Minute Onesie Dress Tutorial - The Remix
Materials: 1/4 yd of your favorite fabric (I got this cute stuff from Joann's) and a onesie
Step 1: Fold your fabric in half hamburger style right sides together and sew (or serge) so you have a ring of fabric.
Step 2: Decide which end of the fabric you want to be the bottom and hem it. I folded 1/4 in. around, ironed, folded 1/4 in. again, ironed, pinned, and then sewed it. You don't have to be so precise about it, but if I don't my hems turn out all wonky.
Step 3: On the other end of your fabric go all the way around with a basting stitch. Don't do any back stitching, and when you get back to the place you started the stitch, get close, but don't overlap the stitches. In the picture you can see the hem on the left and the basting stitch on the right.
Step 4: Look at the wrong side of your fabric at the place where your basting stitch comes together. Tie the two strings that show up on the bottom together at least 5 times (very important unless you want your gathering stitches to come undone and drive you crazy). Then trim the strings so they don't get in the way.
Step 5: Now look at the right side of your fabric and find the other two strings from your basting stitch. Pull on these and fanangle the fabric so it gathers in a cute skirty kind of way. Don't pull too hard or you'll break the string and have to start over with a new basting stitch. Pull the strings until the gathered edge is the width of your onesie. Once it is tie these two strings together at least five times (Seriously, do it. It's the most frustrating thing in the world when the basting stitch comes undone). When you've got the strings tied you can move the fabric around more freely. Be sure to disperse the fabric evenly around the skirt.
Step 6: Now take your onesie, turn it inside out and draw a line at the waist on both the front and back.
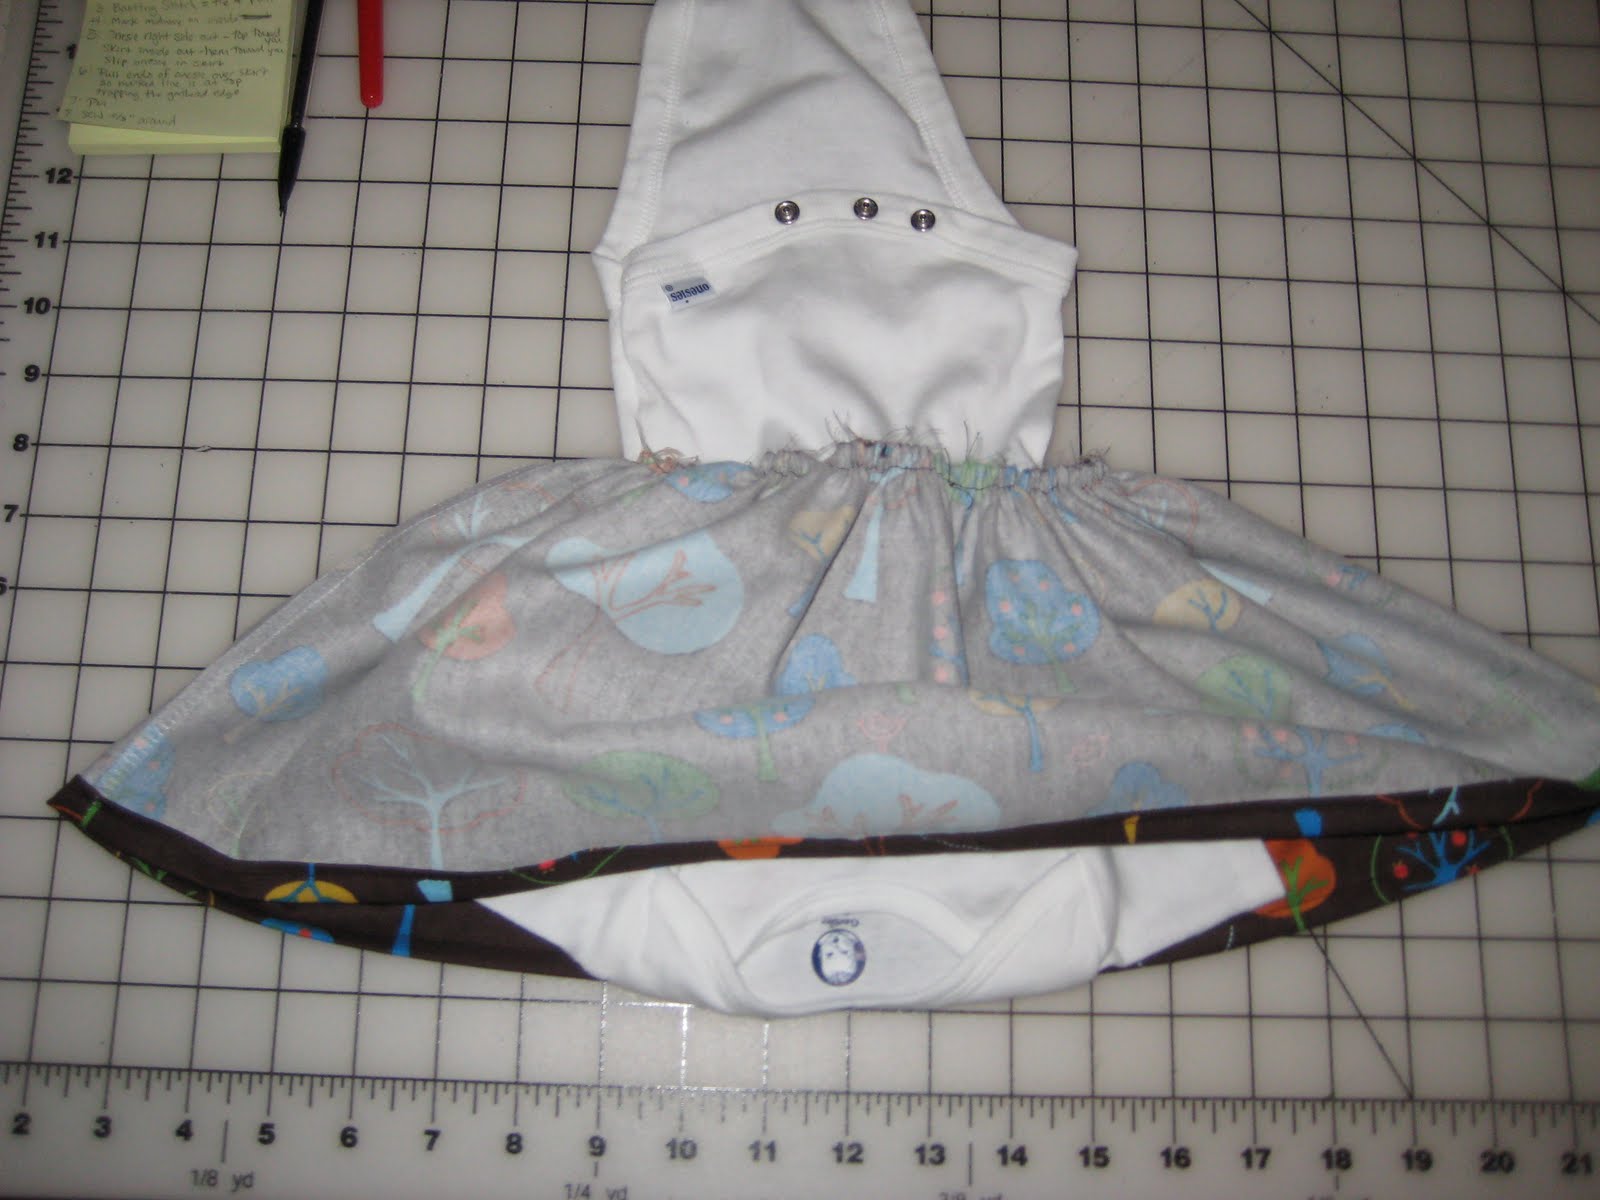
Step 7: Turn the onesie right side out again, and then turn your skirt inside out. Arrange the skirt so that the hem is to one side. Place the onesie on a table with the top toward you. Take the skirt with the hem toward you (make sure it's inside out) and put the bottom of the onesie in through the skirt. The gathered end of the skirt should sit at the waist of the onesie.
Step 8: Pull the end of the onesie over the skirt so the marked line shows up right at the top of the fold. Your onesie should be trapping the gathered edge of your skirt.
Step 9: Make sure that the gathered edge touches the top of the fold all the way around and pin.
Step 10: You can now sew 5/8 in. from the fold all the way around your onesie. You can do this stitch with either a serger or a regular sewing machine. The serger is nice because it gives you great stretch with less bulk.
If you sew this with a regular sewing machine, maintain the 5/8 in. width. When you turn it right side out, take one side of the dress at the seam you just made in each hand and pull outward until you hear a little pop. Now your onesie dress will stretch!
Admire your handiwork!


Oh my! SEW much easier than what I did when I made my granddaughter's onesie. Thanks for posting. It gives me courage to try another one! LOL
ReplyDeleteI am a beginning sewer (as in, I started this week). I found your site while Googling "easy sewing projects for beginners," and decided to give this project a try. It turned out great! Thanks so much!
ReplyDeleteHow did it go Amy?
DeleteI don't follow this statement for sewing it on a regular machine to make it stretchy...."When you turn it right side out, take one side of the dress at the hem in each hand and pull outward until you hear a little pop. Now your onesie dress will stretch!"
ReplyDeleteWhy would you want to pop a stitch at the hem of the skirt and not up on the onesie? I am sorry, I'm confused. Please e-mail answer to marymo50@yahoo.com. Thanks
Hey, sorry about that. You're right, you don't want to do it on the hem of the skirt, you want to pull on the sides of where you sewed it on the onesie. I'll make sure to go an change that right now. Thanks for catching my error!
DeleteThat is fine; I am easily confused. ;) I showed these to my daughter and she thought they would be so cute on her little girl. Thanks for the correction and I will try to send a picture when we complete one. Thanks for the tutorial, I appreciate the visual of the how-to!
Delete