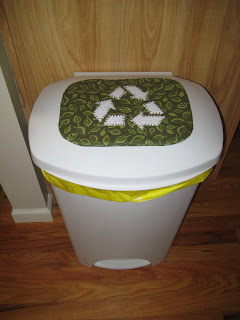
So this sign is really gross and ugly, and it's been up in our house for over a year now. I hate looking at it, so I decided to make something cute to replace it.
Materials:
1 Fat Quarter
2 Felt Squares ($0.23 each at Joann's)
Embroidery Thread (optional)
Tacky Spray (optional)
Some Velcro
Step 1: Find a picture online and print it out. Cut out your shape and use those pieces to cut out your felt (or other fabric). I decided to use felt because it's super easy to work with and when you hand sew it on you don't have to turn under any edges.
Step 2: Figure out how big you want your sign to be and cut out a front and a back from your fat quarter. I used a cd to help guide my edges. I didn't really worry about cutting anything out perfectly, so I just kind of went for it.
Step 3: Lay out your felt pieces where you want them on the fabric. Then lift up one piece at a time, spray the nasty tacky spray stuff on the back and place it back in it's spot on the fabric. I use the tacky spray so that the pieces are all in their correct spot and I don't have to worry about it while I'm hand sewing.
Step 4: Hand sew around your shapes to hold them down. I used embroidery thread because I think it gives it a fun chunky look (I don't know why it looks "chunky" to me, but that's the word that comes to mind). You can use regular thread if you don't have any embroidery floss floating around your craft room.
Step 5: Cut out four strips of velcro and sew them onto the back piece of your fabric. I decided that I wanted my sign to be a little thicker, so I threw a piece of felt in the middle. I also had this genius idea to use sticky back velcro - that way it'll stick to the trash can easily. However, sewing on the sticky velcro made my sewing machine pretty mad. I had to change the needle afterwards. I'm not sure I've every really changed the needle, so it was probably time anyway!
Step 6: place your right sides together (don't forget your felt layer if you're using one. So it's stacked front (face down), back (face up), and then felt.) Pin everything together and sew around leaving a 3" opening somewhere.
Step 7: Turn your sign right side out and hand stitch up the opening.
Step 8: Attach the velcro to the trashcan lid and admire!


No comments:
Post a Comment