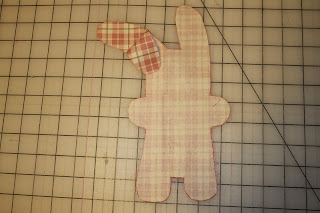
Materials:
1 fat quarter
poly-fil (stuffing)
felt scraps
embroidery floss and needle
15" ribbon
She would make a cute addition to any nursery!
Step 1: Draw your own bunny outline, or use my template here. If you're making your own, remember that your pattern needs to be about 1/4" bigger all around to account for your seams.
Iron your fabric and turn it over so the wrong side is facing up. Trace your pattern on the fabric once, then flip the pattern over and trace it again.
Cut out your bunny shapes. They should be mirror images of each other.
Step 2: Out of your felt scraps, cut a little tail and a triangle for the nose. Place the tail where you want it to be on the bunny and hand stitch it on. Felt doesn't fray, so you don't need to worry about turning the edges under.
Do the same for the nose.
Using embroidery floss, stitch on a mouth and some eyes.
Step 3: Put the two bunny pieces right sides together
and stitch around the edge with a 1/8"-1/4" seam. Leave a 2" opening for turning and stuffing your bunny.
Clip the curved edges and corners.
Step 4: Turn right side out. Use a turning tool to help you get the ears.
Stuff him up nice and full and hand stitch the opening shut!
Tie a little ribbon around the neck and you're done!
He adds a nice splash of color to his other bland bunny friends!


No comments:
Post a Comment