Ok, so I`m not going to do the weekly weigh in anymore. I didn`t give up on my weightloss endevors, I`m just not making enough progress to warrent a weekly update. Instead I will be doing a monthly update. So here is my November info and I will check back in at the end of December! My only goal for this month is to not gain any weight. I'm at a point where I am not motivated at all and since the holidays are upon us I feel like this is a realistic goal for me. I've also decided not to post a picture because they all horribly unflattering. Hopefully next month's picture will be better.
Current Weight: 184 lbs
Total Weight Loss: 29 lbs
Wednesday, November 30, 2011
Friday, November 25, 2011
Fat Quarter Friday: Furoshiki
This week's project is the simplest, but also one of the most fun. This week we made our very own furoshiki! What's Furoshiki you say? Well, it's basically it's a cloth that you wrap and tie in all kinds of different ways. Their website can be found here.
Materials:
2 fat quarters (preferably thin, light weight fabrics)
Step 1: Cut your two fat quarters into the largest squares that you can. I think mine turned out to be about 18 x 18 in.
 Step 2: Put them right sides together and sew around the outside. Turn right side out.
 Step 3: Top stitch around the outside of the square.
 Step 4: You're done! Now you can look here to find a ton of different uses for your furoshiki. Here are a couple that I tried out. I like this first one best!


Materials:
2 fat quarters (preferably thin, light weight fabrics)
Step 1: Cut your two fat quarters into the largest squares that you can. I think mine turned out to be about 18 x 18 in.


Friday, November 18, 2011
Fat Quarter Friday: Onesie Dress with Embellishment
This week I made another embellished onesie dress, but this time out of a fat quarter! I got the original onesie dress tutorial from Prudent Baby. The embellishment is off of Sutton Grace. Both are amazing blogs!
 Materials:
1 Fat Quarter
1 Onesie (just a little bit too big)
*Note: Use 1/4 inch seams unless otherwise indicated.
Step 1: On the short edge, cut off a 2 1/2 in strip. Set this piece aside, we wont use it until the end.
 Cut the remaining fabric in half (this cut will be perpendicular to the cut you just made).
 Step 2: Take your two large pieces and place them right sides together. Sew down one of the short edges. Iron this seam open.
 Along one of the long edges make a hem by folding the edge over two times and sewing it in place.
 Step 3: Along the other long edge sew a basting stitch. Pull on the ends of the thread to gather the fabric. Keep gathering the edge until it is the same size as the waist on your onesie when the length of fabric is folded in half.
 With your length of fabric folded in half (right sides together) sew the remaining short sides together. You now have a skirt!
 Step 4: Mark on the inside and outside of your onesie where the waist is.
 Step 5: Lay your skirt inside out with the gathered edge of the skirt up. Take your onesie (right side out) and slide it into the skirt opening so that the snappy part comes up through the gathered edge of the skirt. Make sure the gathered edge of the skirt matches up with the waist marks you made on the onesie.
 Step 6: Fold down the snappy part of the onesie around the gathered part of the skirt and pin in place.
 Sew around the folded edge giving yourself about a 1/2 in seam.
 The skirt's done! Now for the embellishment.
 Step 7: Take the 2 1/2 in strip, fold it in half long ways (wrong sides together) and sew along the open edge.
 Iron the seam onto the back of the strip. This little trick makes it so we don't have to turn a long skinny tube right side out.
 Step 8: Sew basting stitches along both long edges (about 1/8 in from the edge) and gather. You'll want to gather enough so that the piece can fit along the neckline of the onesie and the raw ends will hide under the envelope neck.
 Step 9: Fold back the flaps of the envelope neck and pin the gathered strip in place. Pin in just under the bound edge of the neckline. Sew along the edges, pretty much right over the basting stitches from earlier.
 Done! Doesn't she look cute?! Her big double chin is kind of covering up the embellished neckline, but I think she looks adorable (I think I may have some bias though).

1 Fat Quarter
1 Onesie (just a little bit too big)
*Note: Use 1/4 inch seams unless otherwise indicated.
Step 1: On the short edge, cut off a 2 1/2 in strip. Set this piece aside, we wont use it until the end.


Tuesday, November 15, 2011
Tuesday Weigh In - Week 9
This week could have been better. I kind of fell off the exercise wagon and I've made two separate batches of cookies this week. Also, I'm feeling too lazy to post a picture of myself. Maybe I'll add one later, but don't count on it.
This Week's Goals:
1. Exercise three times this week for 20-30 minutes.
2. Portion control - try to keep it reasonable.
Even though I lost two pound this week, I'm not feeling great about it. I guess I feel like I don't deserve it since I didn't meet my goals, or that it's just some fluke and I've actually gained weight. We'll just have to see what this week will be like!
Previous weight: 183.5 lbs
Current weight: 181.5 lbs
This week's weight loss: 2 lbs
Total weight loss: 31.5 lbs
Last Week's Goals:
1. Complete Week 3 of the Biggest Loser 30 Day Jump Start video. This week it's 30 minute workouts six days a week.
1. Complete Week 3 of the Biggest Loser 30 Day Jump Start video. This week it's 30 minute workouts six days a week.
Not Met. I didn't give up completely however, I did work out twice this week for 30 minutes each time. I'm getting really sick of doing the same workout video over and over again, so I think it might be time to branch out. I'm really enjoying my pilates class, so at least there's that.
2. Portion control...I don't need to eat the same amount of food that my husband does, even though I want to.
2. Portion control...I don't need to eat the same amount of food that my husband does, even though I want to.
Meh, I'm working on it. I'm not really doing a great job on eating healthy. Let's face it, healthy food is gross and it's so much easier and more satisfying to eat pizza. Let's just say that some days are better than others. Take today for instance, I've only eaten two cookies today as opposed to the six I ate yesterday, so I'm considering this a good day...(mmm they're really good cookies by the way, banana chocolate chip!)
1. Exercise three times this week for 20-30 minutes.
2. Portion control - try to keep it reasonable.
Even though I lost two pound this week, I'm not feeling great about it. I guess I feel like I don't deserve it since I didn't meet my goals, or that it's just some fluke and I've actually gained weight. We'll just have to see what this week will be like!
Sunday, November 13, 2011
Rain Cloud Mobile
This felt cloud mobile makes me smile. There was this big blank wall above Ada's changing table and I wasn't sure what to put there until I saw this cute rain cloud mobile. How could I resist? I just knew I needed to make one for Ada's room. Plus, now she has something to stare at while I'm changing her diaper!

This project is so easy and fun and came together really quickly.
Materials:
A few sheets of colorful felt (I used 5)
10 x 17 in piece of white felt (I bought a section of 1/2 yard, but that's a lot of extra if you're not planning on using lots for some other project.
Needle and thread
 Step 1: Make two templates using scrap paper. My cloud measures 10 x 17 and my rain drop is 3 x 5 1/2. Cut out 2 clouds from the white and 18 rain drops from the assorted colors.
 Step 2: Begin hand stitching around your raindrops and cloud. Make sure to stuff them when you have about 2 inches left, then close it up!
 Step 3: Admire your cute little pillows. Arrange them in the way you want your mobile to look and use white or clear thread to attach the raindrops to each other and then to the cloud. Tie some yarn to the top of the cloud to have something to hang it off of.
 Hang it up. I love it, and so does Ada!
Don't be intimidated by all the hand sewing. Sewing with felt is super simple because you don't need to worry about frayed edges or anything like that. If you absolutely hate sewing by hand (and I know most people do) you could easily sew these on the machine and to be honest it will probably look nicer. The main reason I hand sewed them was so I could have something to do with my hands while Ada was nursing.

This project is so easy and fun and came together really quickly.
Materials:
A few sheets of colorful felt (I used 5)
10 x 17 in piece of white felt (I bought a section of 1/2 yard, but that's a lot of extra if you're not planning on using lots for some other project.
Needle and thread


Friday, November 11, 2011
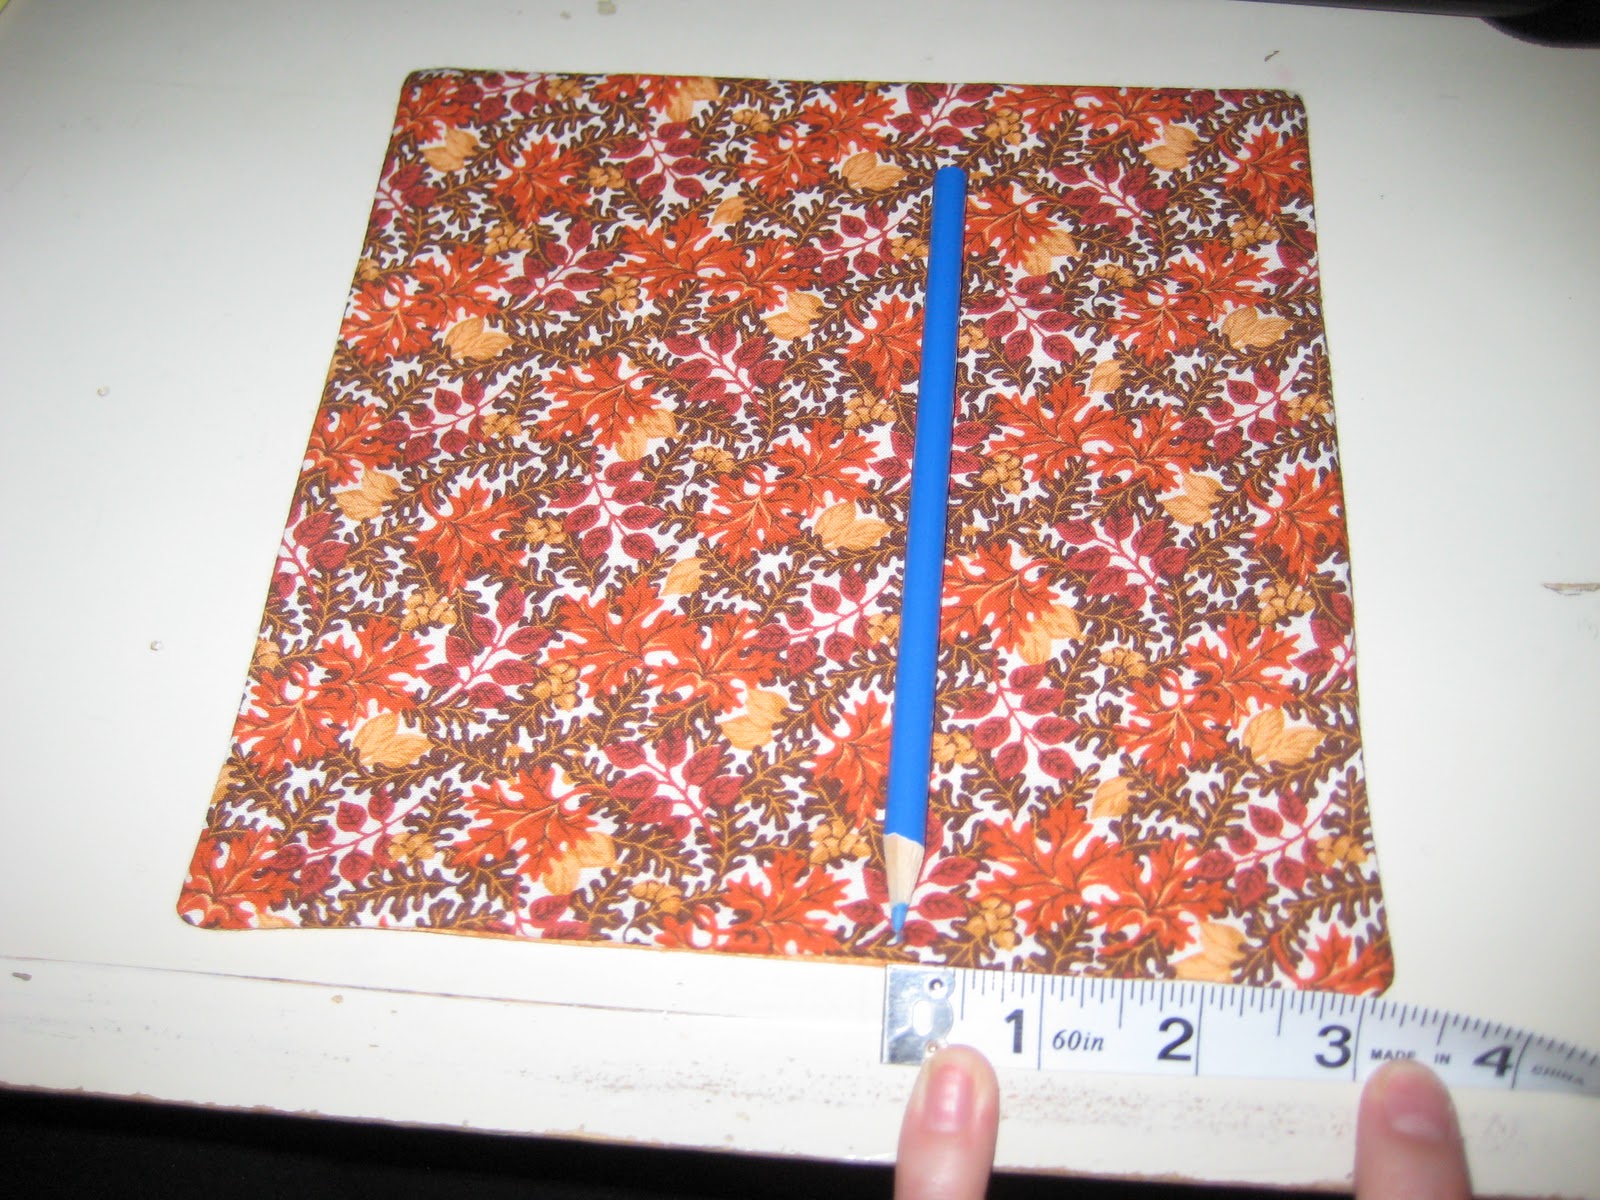
Fat Quarter Friday - Gift Pouch
This week I made a tiny little gift pouch I saw on A Spoonful of Sugar. It was super easy and quick to make, and turned out pretty cute. If I decide to make more, I would want them to be a little bigger, maybe a 10 x 10 inch square to start with instead. Maybe that's just because I'm greedy and want it to hold more treats!
Materials:
2 Fat Quarters (or one if you don't care if it's two toned)
60 inches of embroidery thread
Step 1: Cut 2 squares 8.5 x 8.5 in.
 Step 2: Put them right sides together and sew with a 1/4 in seam all the way around leaving a 3 in opening for turning.
 Turn it right side out and hand stitch up the opening.
 Step 3: Measure in from each corner 3 1/4 inches and make a mark (you should have 8 marks total).
 Fold in each corner at the marks you just made and iron each flap down.
 Sew each flap down 1/2 in from the edge.
 Step 4: Take your 60 in of embroidery thread and cut it in half. Take one piece and tie the end onto a safety pin. Thread it through all four sides.
 Tie the two ends together.
 Repeat with the other string, making sure the strings end up on opposite sides.
 Step 5: Flip the square over and pull on each loop. You can fill it with little treats and then tie the strings into a bow.
 You could make a silly little tag for it.

Check out my awesome Martha-esc place setting, yeah I have talent...

Materials:
2 Fat Quarters (or one if you don't care if it's two toned)
60 inches of embroidery thread
Step 1: Cut 2 squares 8.5 x 8.5 in.


Check out my awesome Martha-esc place setting, yeah I have talent...

Thursday, November 10, 2011
Oatmeal Raisin and Chocolate Chip Cookies
So my husband loves oatmeal raisin cookies, and being the terrible wife that I am, I have never made them for him. We've been together over eight years now, so it's about time. They are (to quote the infamous fergie) t-t-tasty tasty!

Ingredients:
1/2 cup flour
1/2 teaspoon salt
2 teaspoons baking soda
3/4 cup sugar
3/4 cup brown sugar
3/4 cup butter (softened)
2 eggs
2 teaspoons vanilla
3 cups uncooked oats
1 cup raisins
1 cup chocolate chips
Step 1: In a small bowl mix the flour, soda, and salt. Set aside.
Step 2: In your mixer, blend together the butter, sugar, and brown sugar. Mix until creamy and then add the eggs and vanilla and mix again.
Step 3: Slowly add the flour mixture to your buttery-sugar mix and blend well.
Step 4: Add the oats, raisins, and chocolate chips and mix.
Step 5: Drop onto greased baking sheets and bake at 350 for 11 minutes or until golden brown on top.
Yummy! I'm thinking that you could substitute the raisins for craisins and they would be a perfect holiday treat!
Tuesday, November 8, 2011
Tuesday Weigh In - Week 8
Well, I gained weight this week, but I still feel like I look better, plus I feel stronger. It's usually at this point that I give up in my fitness endeavors, so I'm just pleased that I haven't said screw it to the whole process. I just have to keep on keepin on.
Previous weight: 182 lbs

Last Week's Goal:
Previous weight: 182 lbs
Current weight: 183.5 lbs
This week's weight loss: + 1.5 lbs
Total weight loss: 29.5 lbs
Last Week's Goal:
Complete
Week 2 of the Biggest Loser 30 Day Jump Start video. This week it's 20
minute workouts six days a week.
Mostly met, I missed one day. Not too bad for someone who dislikes exercise.
This Week's Goals:
1. Complete Week 3 of the Biggest Loser 30 Day Jump Start video. This week it's 30 minute workouts six days a week.
2. Portion control...I don't need to eat the same amount of food that my husband does, even though I want to.
Friday, November 4, 2011
Fat Quarter Friday: Puff Pin Cushion and Scrap Bag
I love my Fat Quarter Friday this week. Does anyone remember those awesome puff quilts? Well I have been thinking about making one here in the near future and wanted to try out a project that would give me a taste of what it would be like. Hence, Puff Pin Cushion and Scrap Bag. I got a few of the ideas for the project from this tutorial from sew mama sew. It turned out pretty darn cute!

Some Fusible Interfacing
1 Button
3.5x7.5 in scrap of felt
About 1/3 cup Uncooked Rice (or something else small and heavy like washers)
Some polyfil
Scrap Bag:
Step 1: Cut from each fabric a 7x10 inch rectangle.
 Step 2: Fold hamburger style with the right sides together. You're going to sew along both short edges, but on the fabric that you would like to be the lining, make your seam a little bit bigger so that your bag will be a little big smaller. I used a 1/4 in seam on the fabric that I wanted on the outside and a 3/8 in seam on the lining fabric. Trim off the corners.
 Step 3: Iron open the seams along the sides.
 Step 4: Put your hand inside along the seam so that it opens up like so.
 About 1 inch in from the tip of the corner sew a straight line and clip off the tip. Repeat on each corner for each bag.
Step 5: Place your bags end to end (still inside out) and match up the sewn up corners that you just sewed and clipped. Zigzag stitch these together on each side so that the lining will stay put.


 Step 8: Fold up the pinned edge and fold it down into the bag. Fold it so that you have a 1/2 in binding showing.
 Sew around the edge to hold it in place.
 Attach a button to the inside top edge. Your bag is complete!
 Puff Pin Cushion
Step 1: Cut a 7x7in square from one fabric and a 4.5x4.5in square from the other fabric. You will need a strip of fabric from one of the fabrics to make the loop for the bag to hang off of. I took a 1.5in wide strip, folded it length wise a couple of times and sewed a line down the edge. You'll also need to cut a piece of felt to be about 3.5x7.5in (that's not the size of the felt pictured here,


 Step 4: Fold the small strip of fabric into a little loop and sew to hold it in place.
Step 5: On the open side of the square, slip the loop end in between the two fabrics and fold the pleats on top of it. Pin in place.

 Step 6: Sew a 1/4 in seam around the outside of the squares leaving one of the sides open.
 Turn right side out.
 Step 7: I accidentally deleted the picture of the little felt bag and rice step, so sorry. Fold the felt strip in half and sew it around the edge leaving about a 1.5 in opening. Fill up the little bag with rice and sew the opening closed.
Step 8: Put the little felt bag inside the poof and let it sit on the bottom. Fill up the poof with polyfil, it'll need to be pretty full so that it functions well as a pin cushion.
 Step 9: This part is kind of hard. Pin down the center of the top fabric. Now you're going to start at one end of the opening and slip stitch the opening closed while putting in your two pleats. Don't worry about it turning out perfect, it doesn't matter because you can't really see that edge anyway.
 Step 10: Hook the
 crap bag scrap bag onto the pin cushion hook. This way it's detachable if you so desire. You're done! Isn't it adorable?!

Materials:
2 Fat Quarters Some Fusible Interfacing
1 Button
3.5x7.5 in scrap of felt
About 1/3 cup Uncooked Rice (or something else small and heavy like washers)
Some polyfil
Scrap Bag:
Step 1: Cut from each fabric a 7x10 inch rectangle.


Step 5: Place your bags end to end (still inside out) and match up the sewn up corners that you just sewed and clipped. Zigzag stitch these together on each side so that the lining will stay put.

Pull the fabric that you want to be on the outside up over the lining fabric. Now you have a rough edge bag.
Step 6: Now we're going to make the stiff binding for the top of the bag. From the lining fabric, cut out two strips of fabric 2x7 in and iron on fusible interfacing to the wrong sides. Next, put the two strips right sides together and sew down both short sides so you have a ring of fabric.

Iron the seams open and fold down one edge of the ring about 1/4 in. Pin in place.

Step 7: Place your ring of fabric with the pinned edge toward the bottom of the bag. Match up the edges and pin in place. Sew around the top of the bag with about a 1/2 in seam.


Step 1: Cut a 7x7in square from one fabric and a 4.5x4.5in square from the other fabric. You will need a strip of fabric from one of the fabrics to make the loop for the bag to hang off of. I took a 1.5in wide strip, folded it length wise a couple of times and sewed a line down the edge. You'll also need to cut a piece of felt to be about 3.5x7.5in (that's not the size of the felt pictured here,

Step 2: Place your two squares right sides together.
Pin the corner of one square to the corresponding corner of the other square. Repeat with all four corners.
Step 3: Make two pleats on each side of the square and pin in place. On each side the folds should go in opposite directions and make it so that the larger square sides match up with the smaller square's sides. For now, only make the pleats on three sides of the square.

Step 5: On the open side of the square, slip the loop end in between the two fabrics and fold the pleats on top of it. Pin in place.


Step 8: Put the little felt bag inside the poof and let it sit on the bottom. Fill up the poof with polyfil, it'll need to be pretty full so that it functions well as a pin cushion.


Wow, that was a lot of steps! I promise it's not that hard to make and it didn't take much time either.
Subscribe to:
Posts (Atom)