Tuesday, October 30, 2012

New and Improved Tutorial: Bubble Quilt Method #2

Here it is, an alternative method for making your bubble quilt (aka biscuit quilt)! This method is a lot easier, but more time consuming (at least for me) because it requires hand stitching. If you want to see the original method I posted, you can check it out here. If you want to see some example of other biscuit quilts I've made and others have made you can see some here and here.
This blanket is a 28"x28" square not including the ruffle (7 puffs by 7 puffs), but you can use the method to make any size blanket you want.
Materials:
1 1/4 yard worth of cotton fabrics for the top (you can do as many or as few different fabrics as you want)
1 yard fabric for the backing (I like minky which is just soft fuzzy fabric)
1 1/4 yard silky fabric for the ruffle
1 bag fiberfill stuffing (I use Poly-Fil)


Step 1:  You're going to need two sets of squares: the top squares that make your bubbles, and the bottom squares that you won't be able to see. The top squares should be 6"x6" and the base squares should be 4.5"x4.5". Reminder: the base squares can be out of any old fabric you have lying around because it doesn't matter what they look like because you won't be able to see them. You need 49 of each.
 Step 2: Now we're going to do some pinning. Take one square from each stack. Line up the corners of one of the small squares to the wrong side of the big square and pin it in place.

 Continue pinning each of the four corners together.

 Step 3: Now we're going to make the pleats. Take the pinned square like so and pinch up the excess top fabric along one side. Pinch the fabric up just a little bit off center.
 Then fold it down so that you have and s shaped pleat centered between the two pins. Pin it in place.
 Repeat on all four sides.
 Step 4: Using a 1/8" seam, sew all the way around the whole square. Don't leave any openings.
 Continue until you have all 49 of the squares finished. Lay them out in the design you want your blanket to be.
 Step 5: We're now going to assemble the top of the quilt. This part is a breeze in this version and a bear in the other. Enjoy it! Take two squares and lay them right sides together. Using a 1/4" sew them together along one edge.
 Assemble your top just like you would any quilt top, piece by piece. Make sure to keep them in the order you want!
 When you get to sewing bigger strips of them together, put in pins at the seams to help keep things in place and to give yourself a nice even top.
 Continue until your entire top is pieced together.
 All your pieces should be flat and deflated.
 Step 6: This next step needs to be done VERY CAREFULLY! Turn your quilt top wrong side up and pinch up the bottom square fabric, be careful not to pinch up any of the top bubble fabric with it!
Now cut a slit about 2" long in the bottom square fabric.
You want your slits to be cut diagonally along the fabric to prevent fraying.
Step 7: Stuff all of the puffs up with stuffing. With this method, you can pretty much fill them up as full as you want, so stuff away!
Once all the bubbles are stuffed, you're going to have to hand stitch up each one of those slits. Arg! I know! Just pop in a movie and power through, it's so much easier than the first method even if it does take longer. I double thread my needle for extra strength.
Step 8: Cut out your backing for your blanket, it needs to be 28"x28".
Cut out and make your ruffle. See my tutorial here to learn how to make one. Take your ruffle and place it on the backing (which is right side up). Line up the raw edges of the ruffle with the edge of the backing and pin in place all around the square.
Sew the ruffle in place with a 1/4" seam.
Step 9: Take your completed bubble top and lay it out right side up.
Place the backing with ruffle right side down on top of the bubbles. Tuck the ruffle inside so you can't see any of it.
Pin everything together and then sew around. Be very careful not to snag the ruffle in the seam during this process. Just go slow and stick you hand in between the pins to straighten the ruffle as you go (see tip below). Leave a fairly large opening for turning the blanket right side out, mine was about 7" wide.
I find it useful to use a zipper foot for this part of the project. Also, when I get to a corner, I pull the fabric like so and stop at the corner
and then shove the ruffle back inside out of the way when I turn the corner. You can watch the video here for a better explanation. The pertinent part starts at about 17 minutes.
Once you go all the way around you can turn the blanket right side out and then last but not least, hand stitch up the opening.
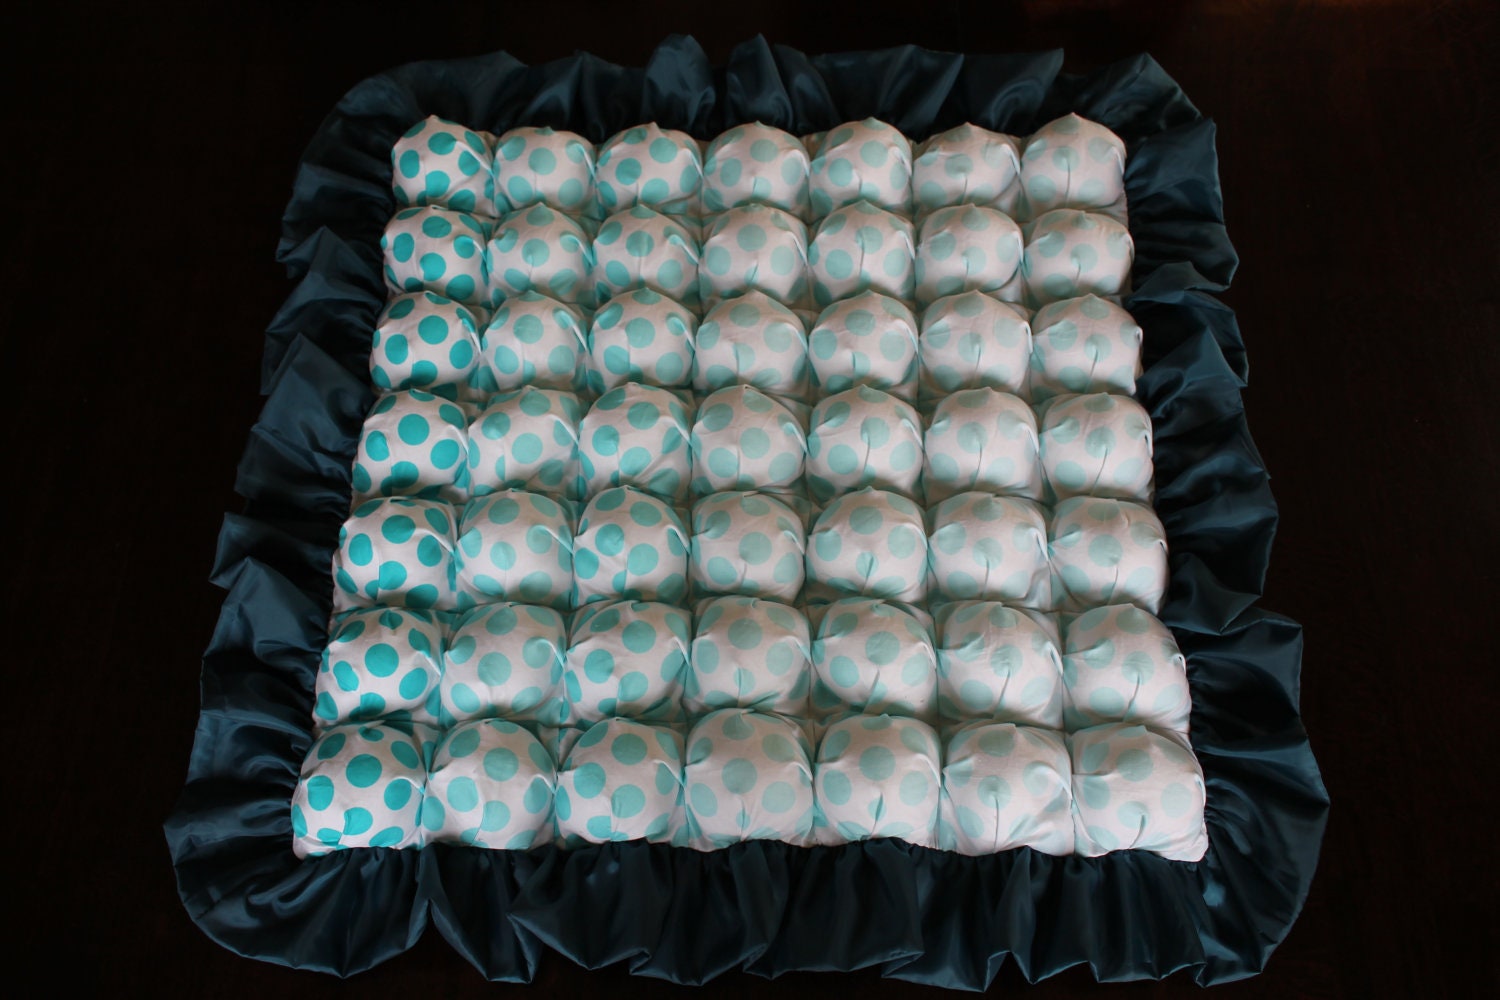
You're all done! Enjoy your amazing new bubble blanket!!!
Bubble Blanket - Biscuit Quilt - Ombre Dots - Turquoise and White Bubble Baby Blanket with Dark Teal Ruffle and Grey Backing - Ready to Ship

Monday, October 29, 2012

How to Get Rid of Fruit Flies

Ugh, fruit flies are the bane of my existence. Not really, but they are a nuisance. We've had quite a few lately, so I looked up ways to get rid of them, and this way proved to be the most effective for us. Plus it started working right away which is nice.
 Materials:
Glass
Piece of paper
Tape
Piece of fruit
Apple cider vinegar (don't use regular vinegar, it repels the flies)
Syrup
Honey
Sugar

Step 1: In the bottom of your glass put some apple cider vinegar, syrup, honey and sugar. I didn't measure anything, but I guess that I did about 1 t of the sugar and 1 T of each of the other ingredients. You don't need to be exact. Then pop it in the microwave for about 15 seconds to help the sugar to dissolve. Then toss in a little bit of cut fruit.

Step 2: Take the piece of paper and bend it into a funnel shape so that you have a teeny hole. Tape it along the edge so it holds this shape. Place the funnel into the glass like so and tape around the edge to seal the cup to the funnel.
Step 3: Place the trap near where you're seeing a lot of them (usually by the fruit bowl or a sink) and wait for it to work it's magic. The flies will be drawn to the smell and go down the funnel, but can't get back out. Yay!

Sunday, October 28, 2012

Weekend Sweets: Rolo Apple Pie Braid

This is a decadent dessert without a lot of work. I saw this recipe over at The Mother Huddle and knew my husband would love it, so I had to give it a go. I made it when we had some friends over and all the guys really liked it. To be 100% honest, I wasn't particularly wowed by it, but my husband was!
Ingredients:
2 packages refrigerated crescent rolls
2 granny smith apples (peeled and sliced 1/4" thick and then in half)
30 rolos (unwrapped and cut in 1/2)
1 t lemon juice
1 T cinnamon and sugar mixture
Topping:
2 T melted butter
2 T flour
1 t vanilla
3 T cinnamon and sugar mixture


Step 1: Take your apples, peel, core and cut the into 1/4" wedges. Then cut the wedges in half hamburger style. Place them in a small bowl and add the lemon juice, and the 1 T cinnamon and sugar. Mix until all the apples are well coated. Toss in the rolo halves and mix up. Set aside.

Step 2: Take your crescent rolls and separate out all the little triangles. Take two triangles and put them together to form an isosceles triangle (see picture). Place the new triangle down on a large greased cookie sheet. Continue with the rest of the pieces overlapping the new triangles to make a Christmas tree shape. Using a rolling pin or your hands seal all of the seams together and then flatten out the dough. This part is important because you don't want a thick layer of dough at the bottom because it won't cook all the way through and you'll have a doughy mess.
Step 3: Once the pastry is ready, plop the apple and rolo mixture onto the center part of the dough from the top to the bottom. It will seem to overflow, but that's ok, just pile it high! Start on one end and bring the pointy edge pieces up and across the apples over to the other side. Do your best to "braid" the dough, but it doesn't need to be perfect, just lock those apples in place. Squeeze the dough together when you bring it over to the other side so that they stay together and all the insides don't ooze out.

Step 4: Now for the topping. Mix the melted butter with the flour, cinn and sugar and the vanilla. Drizzle on top of your danish and cook for 30 minutes at 350.

Saturday, October 27, 2012

Disney World and Universal Studios

Last week we had the amazing opportunity to visit Orlando, FL. Brian, Ada and I met my parents there and we visited Universal Studios and several of the Disney parks. It was so much fun even though we caught some sort of flu bug!

Universal Studios was the best because they have the Harry Potter park. Yeah, Brian and I are huge Harry Potter geeks. It's only the best book series ever, so can you really blame us? We got butterbeer, wands, and I purchased a sweet timeturner key chain that I'm going to fashion into a necklace.


Also at Universal they had the Marvel section, so Ada got her picture with cyclops, which is pretty great too!
Now to the various Disney parks!
Beautiful fireworks!
The Animal Kingdom was awesome. We went on a safari and I could've reached out my arm and touched a rhino! Ada loved all the animals!


I think I've found my calling. I should be a beautiful princess in a parade. These people were so amazingly perfect for Cinderella and Prince Charming. Oh beautiful people how I hate and adore you.

Thanks for everything Grandma and P-pa, you guys are the best!!!!