Materials:
Two fat quarters
Elastic
Here are your cutting measurements for the different sizes, I made a 6-12 month size. Since I used fat quarters, they aren't long enough, so I would cut two strips, for example if I was making the bottom tier for the 0-3 month size, I would cut two strips 3" x 19". So you just half the second number and make two strips (or just use longer fabric instead of fat quarters). This skirt is very versatile, so if you want it longer or shorter, just adjust the widths of your tiers, or add more tiers!
0-3 month:
Top Tier - 3" x 21"
Middle - 2.5" x 28"
Bottom - 3" x 38"
Elastic - 13"
3-6 month:
Top Tier - 3" x 23"
Middle - 2.5" x 30"
Bottom - 3" x 41"
Elastic - 14.5"
6-12 month:
Top Tier - 3.5" x 24"
Middle - 3" x 32"
Bottom - 3.5" x 43"
Elastic - 16"
Step 1: Take the fabric that you want your middle layer to be and cut out your two strips (mine were 3x16).
Take your second fabric and cut out two strips for the top tier (mine were 3.5x12) and the bottom tier (mine were 3.5x 21.5).
Step 2: Put each of the matching strips right sides together
and sew down both of the short sides on each. You now have three rings of fabric.
Step 3: Take your bottom tier and do a basting stitch along one of the edges. Pull on the strings to gather up the fabric until your third tier is the same length as your middle tier.
Layer the gathered edge of the bottom tier with the middle tier, right sides together and pin in place. Make sure your side seams match up.
Sew them together.
Step 4: Take your top tier and fold over one of the sides 1.25" and pin in place. This is going to be the casing for the elastic.
You're going to sew this in place, but as you do, fold under the raw edge 1/4" so that you have a nice clean edge that won't fray. Leave a 1" opening.
Step 5: Take your middle tier and put a basting stitch around the top. Pull the strings and gather the fabric until it is the same length as your top tier.
Pin them right sides together
and sew.
Step 6: Now your going to hem the bottom of the skirt. Fold the bottom edge of the third tier under twice 1/4" and sew in place.Step 7: Cut your elastic to be the appropriate length (see chart at the top). Attach a safety pin to one end of your elastic and thread it through the casing on the top tier.
Once you've gone all the way through and out the end, put your two ends of elastic stacked together and sew securely in place.
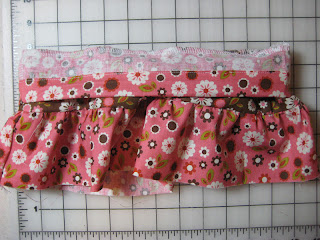
You're done! Enjoy this super quick and easy project.


No comments:
Post a Comment